Search

Items tagged with: Putty


There is a new short domain name for #PuTTY!

putty.software/

At present, this is just a "landing page": a nice short name to remember, which will redirect you to the full PuTTY website at the same longer URL where it's always been.

But unlike putty.org or other third-party landing pages, this one is run by us, the actual PuTTY team, and it doesn't have a weird separate agenda of its own.

I intend to move the main PuTTY site over to that domain in the future, and leave just a redirector at the old location. But first I want to get the word out, so that people know which site to trust.

If anyone is still linking to putty.org, here's a place to link to instead. Please spread the word!


General reminder:

The domain name putty.org is *NOT* run by the #PuTTY developers. It is run by somebody not associated with us, who uses the domain to interpose advertising for their unrelated commercial products. We do not endorse those products in any way, and we have never given any kind of agreement for PuTTY's name to be used in promoting them.

Please do not perpetuate the claim that putty.org is the PuTTY website. If anyone is linking to it on that basis, please change the link. The PuTTY website is chiark.greenend.org.uk/~sgtath… and it always has been.

You can check this by downloading the source code, which cites that URL in many places (the README, the documentation, some strings in the actual code), or by using the "Visit Web Site" menu options in the official Windows binaries (the ones signed with my personal Authenticode certificate). The true PuTTY website is the one that PuTTY itself says it is.

Many search engines list putty.org above chiark. I don't know if this is due to active SEO on the part of the domain owner, or a heuristic in the rankings. Either way, don't believe them. It's not our site.


Nextcloud auf der Kommandozeile aktualisieren


Ich möchte zeigen, wie ich bei Hostsharing eine Nextcloud auf der Kommandozeile aktualisieren kann.

Für kleine Nextcloud-Installationen reicht es meistens, die Updates im Browser durchzuführen.
Aber gerade bei größeren Nextclouds ist es ab einer gewissen Benutzeranzahl sinnvoll, das Update auf der Kommandozeile durchzuführen.
Da steht mehr RAM zur Verfügung, und die Laufzeit des Skriptes kann beliebig lang sein. Im Browser wird da schon mal zu früh das Update abgebrochen.

Ich zeige jetzt, wie ich mich mit Windows auf der Kommandozeile bei Hostsharing anmelden kann.
Ich selber bevorzuge Linux, aber Windows ist ja doch noch recht verbreitet.
Auf Windows muss ich das Programm Putty installieren.

Hier kann Putty heruntergeladen werden:
chiark.greenend.org.uk/~sgtath…

Dann starte ich Putty, und melde mich auf dem Server bei Hostsharing an.
Ich kann die Session speichern.

Mein Benutzername ist mein Paketbenutzer, xyz00, in meinem Beispiel tim05.
Mein Hostname ist mein Paket xyz00.hostsharing.net, in meinem Beispiel tim05.hostsharing.net

Das Passwort habe ich aus meinem Passwortmanager in die Zwischenablage kopiert, und kann jetzt mit einem Rechtsklick auf das Putty Fenster das Passwort einfügen.
Dann muss ich noch die Entertaste drücken, und bin angemeldet.

Ich kann auch Befehle hier auf der Kommandozeile mit einem Klick auf die rechte Maustaste einfügen:
echo "Hello World"

Ich kann sehen, unter welchem Benutzer die Domain läuft:

ls -la /home/doms/nextcloud.test.beispielverein.de
ich drücke die Tabulatortaste, um den Pfad automatisch zu ergänzen.

Dann wechsel ich mit dem sudo Befehl in diesen Benutzer, also schlüpfe in seine Rolle:

Ich markiere den Benutzernamen mit der Maus, und kann dann die Markierung mit der rechten Maustaste einfügen:
sudo -u tim05-nextcloud bash

Hier wechsel ich erstmal ins Home Verzeichnis:

cd ~

Mit ls -la sehe ich die Verzeichnisse

Jetzt können wir der Anleitung im Wiki folgen:
wiki.hostsharing.net/index.php…

xyz00-cloud@h00:~$ cd ~/nextcloud/updater
xyz00-cloud@h00:~/nextcloud/updater$ chmod u+x updater.phar
xyz00-cloud@h00:~/nextcloud/updater$ ./updater.phar

Es sollten außerdem ein paar Routine-Aufräumarbeiten durchgeführt werden:

xyz00-cloud@h00:~$ cd ~/nextcloud
xyz00-cloud@h00:~/nextcloud$ php occ db:add-missing-primary-keys --no-interaction
xyz00-cloud@h00:~/nextcloud$ php occ db:add-missing-columns --no-interaction
xyz00-cloud@h00:~/nextcloud$ php occ db:add-missing-indices --no-interaction
xyz00-cloud@h00:~/nextcloud$ php occ db:convert-filecache-bigint --no-interaction

So können die Apps noch alle aktualisiert werden:

xyz00-cloud@h00:~$ cd ~/nextcloud
xyz00-cloud@h00:~/nextcloud$ php occ app:update --all -n --no-ansi


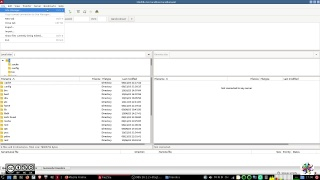
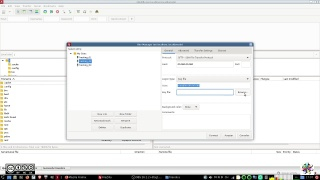
There are two ways to add your keys to #FileZilla.

You can add your keys inside the "Site Manager":

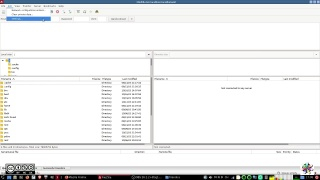
Go to:
File -> Site manager ..

Screen of FileZilla showing where to find the option

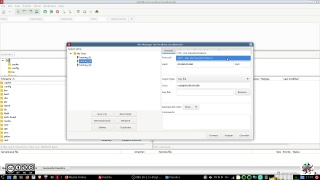
Protocol:
In the settings panel for a given site select sFTP:
Screen of FileZilla showing where to find the option

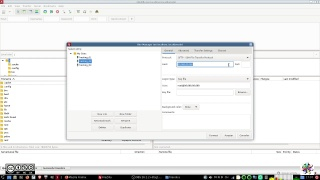
Add domain IP or domain name:
Screen of FileZilla showing where to find the option

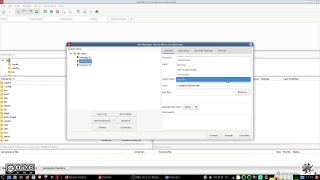
Logon Type:
Select "Key File"
Screen of FileZilla showing where to find the option

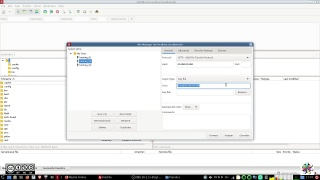
Add the user name to log onto the server:
Screen of FileZilla showing where to find the option

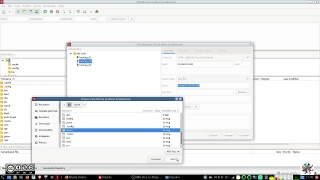
Browse for the .ppk you want to add and select it:
FileZilla offers you also to add .pem (privkey.pem) files, that's the #puTTy option for a file containing only the extracted private key of keyfile.ppk. At the same time FileZilla doesn't read/accept .pem files so it will prompt you to transform it into a .ppk file. If your .ppk is protected by a password (it should be), you get prompted to insert the password.
It is not clear if the newly created .ppk file from the .pem file by FileZilla is protected with the same password. It doesn't feel like that.
Screen of fileZilla showing where to find the option Screen of fileZilla showing where to find the option

Save the changes and connect to your server.


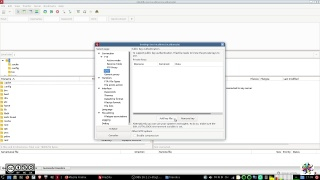
The other option to add your key to FileZilla is by adding it directly to the main settings.

Go to:
Edit-> Settings ..

Screen of FileZilla showing where to find the option

Choose SFTP and select the "Add key file" tab:
Screen of FileZilla showing where to find the option

Add the key file and save.
If you use the input fields and quick connect options of the main FileZilla window, the keys saved in settings will be retrieved.

#linux #windows #howTo #fediVerse