Peter Vágner reshared this.
Peter Vágner reshared this.
This thread is worth reading if you are a Google docs user.
Short version: When you export a document from Google Docs, Google replaces all your hyperlinks with links that allows Google to monitor the interactions of everyone you share your document with.
This hidden link replacement can potentially be used to build a model of your professional relations, where people who interact more with your content are considered a stronger relation.
Think about the implications.
fosstodon.org/@Joe_0237/111145…
Today I found out that google docs infects html exports with spyware, no scripts, but links in your document are replaced with invisible google tracking redirects.Fosstodon
reshared this
I have just found a nice document scanning app for android that can do automatic edge detection, cropping, multipage scanning, OCR, PDF export and more.
It's called #makeacopy and it's using #tesseract engine to perform the OCR directly on the device with no internet connectivity requirement at all.
The app has almost full #a11y support for screen reader users in the sense that all the controls are clearly labelled and it's easy to navigate.
I can't resist and I have asked the developer if it would be doable to add a screen reader compatible notifications making the automatic edge detection somehow accessible as well.
Now I'd appreciate comments from low vision screen reader users, mobility trainers, people assisting other blind people or others who might be able to tell if my idea is viable and how much you like it?
Here is link to the github issue I have started: github.com/egdels/makeacopy/is…
Thanks for looking into it.
reshared this
ondrosik reshared this.
Here's the most efficient way I've found to make a video from an image plus audio file that preserves quality.
ffmpeg -threads 3 -hwaccel auto -r 1 -loop 1 -i "image.file" -i "audio.file" -c:v libx264 -preset ultrafast -x264opts opencl -vf scale=1280:720 -c:v libx264 -tune stillimage -c:a copy -shortest "video.mp4"
- A command prompt terminal should open and the encode should start. You can check the status by reading the bottom of the window.
- The window will close once the encode is complete. This could take anywhere from a few seconds to five-ten minutes. You should see a video file in the folder that is only a few MB larger than the audio+image files you started with.
reshared this
Make this a bat file on your path, start with image first, then audiofile, and you'll get audiofile.mp4 as an output.
@ffmpeg -threads 3 -hwaccel auto -r 1 -loop 1 -i %1 -i %2 -c:v libx264 -preset ultrafast -x264opts opencl -vf scale=1280:720 -c:v libx264 -tune stillimage -c:a copy -shortest "%~dpn2.mp4"
Andre Louis reshared this.
Zoom released New firmware for H1E. I am sending this again because i broke the first post.
✨ Your new public_html folder is here, upload html and ~your-site is ready
~ public.monster 🐙
I'm pretty sure I'll regret making this, but upload your public monstrosity and let's see how it goes. Some fun may be had. I'll watch carefully for now 🕵️
reshared this
reshared this
Peter Vágner reshared this.
So on a fresh Windows 11 install, I would need to now run at least 4 GitHub scripts just to make it behave and tamed down to the process plus ram usage of Windows 10. Unbelievable. I'm going to provide links here, you use these at your own risk. I'm also favoriting this post for myself so this is a bit for me, too.
All of these require that Defender's "realtime protection" and possibly "tampor protection" stay off. Defender is very yelly.
First thing I do: github.com/ShadowWhisperer/Rem…
This removes Microsoft Edge, and I use the WebView remover. If you use JAWS, this one might not be for you, since I believe JAWS relies on the webView.
2. Spicy: Remove defender. Not for everyone, but if you have a 3rd-party scanner and AV you use that's light, or just want to manually scan files and do daily quick scans with a tool of your choice, it's good. Using WSL will reinstall the hypervisor bits. It does a lot, so be cautious.
github.com/ionuttbara/windows-…
3. New to the list: github.com/zoicware/RemoveWind… - for getting rid of all AI features. Again, large script, read and consult carefully.
4. My own quick debloat Gist for LTSC: gist.github.com/tgeczy/2d847e2…
This does a lot more plumming removal, and disables your search box, so don't be surprised.
5. For search box: Open Menu: github.com/Open-Shell/Open-She… - works really well.
Bonus: github.com/Raphire/Win11Debloa…

Powershell script to debloat Windows 11 LTSC. GitHub Gist: instantly share code, notes, and snippets.Gist
ondrosik likes this.
reshared this

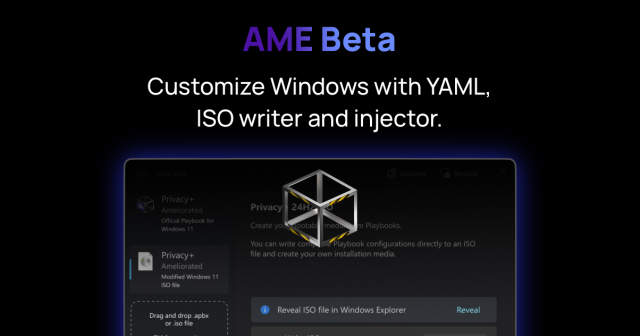
Completely transform your computer in minutes. Simply download a verified Playbook, or use your own, and run it in AME Beta.amelabs.net

Enola Gay (Orchestral Manoeuvres in the Dark) vs Sarà Perché Ti Amo (Ricchi E Poveri)YouTube
My new favorite LLM trick.
Here's a link. Here's the JSON structure I need. Write me a Python script that takes this link and generates what I need.
15 minutes later, I have a working scraper.
This needs a sandboxed coding agent with network access approval (Openai Codex is perfect for this).
ondrosik reshared this.
@midzi iOS apps won't have enough permissions to do this. You have to set up mitmproxy on your computer, you'll also need to install its TLS certificate (as a provisioning profile on the iPhone) so that it can intercept encrypted https traffic.
This assumes the app doesn't have certificate pinning. If it does, that's a lot more reverse engineering, an Android device would come in handy here.
Recently, I discovered Mynoise.net by @Stéphane (Dr. P). Sometimes, when I cant sleep or need background noise for boring work, I use various background soundscapes. Here is my article about Mynoise from the blind users experience. Long post follows:
Here you can also try other soundscapes, such as Rain on a Tent or Fireworks. I recommend opening the Full List. The soundscapes are organized under headings.
At this point, the possibilities of Mynoise are just beginning. Each player can be customized. Although the ambiance differs, the controls are always the same. Let’s take another look at the previously mentioned Wind, Sea, and Rain Noise.
Under the heading Presets, you’ll find buttons with various predefined settings. Activating them changes the sound’s characteristics. For instance, you can choose Breaking Waves or Irish Summer.
Under User Stories, you’ll find user comments. By activating a comment, the sound’s parameters adjust to the same configuration used by that commenter.
Let’s say you want to manually adjust the balance between wind, waves, rain, and so on. Each player consists of ten sliders whose volume you can control. Here’s how:
The author thought of that, too. Press B to find the Save as URL button. After pressing it, a URL containing your custom parameters will appear in an edit field. You can copy this link to your clipboard and save it as a bookmark. That’s how it works in Firefox. Chrome, on the other hand, will automatically reload the page with the new URL. You can share this URL as usual—for this article, I created This Noise as an example.
Yes, and there are two ways to do it. If you’ve been experimenting with the site for a while, you might have opened one soundscape in one browser tab and another in a second tab. However, this setup is difficult to save or share. Fortunately, you can create a single page that combines multiple generators—up to ten soundscapes in one! This way, you can really make something like a Campfire in the Rain. Here’s how:
Unfortunately, Mobile app is not accessible for blind users yet. You can still use Mynoise in your smartphone’s web browser. The easiest way is to share the custom links you prepared on your computer. That way, you’ll always have your favorite sounds at hand—for example, to help you sleep.
The author also offers online radios featuring some of the sounds. You can find them in the RadioBrowser database by searching for Mynoise. Additionally, there’s a podcast called Pomodoro Sessions, so you can enjoy your favorite soundscapes right in your podcast app.
The author is open to discussing accessibility. Thanks to this, button labels have already been added to the player pages. To celebrate finishing this article—and your reading it all the way through—you can listen to Fireworks.

Podcast · myNoise · No ads, no talking. This podcast provides a wide range of background noises and music formatted for the Pomodoro technique: stop procrastinating and get the job done, 25 minutes at a time! These sounds won’t interfere with your fo…Spotify
Peter Vágner likes this.
Peter Vágner reshared this.

Meta's rationale behind this move is that WhatsApp Business API is designed for businesses serving customers rather than acting as a platform for chatbot distribution.Ivan Mehta (TechCrunch)
reshared this
Peter Vágner likes this.
Peter Vágner reshared this.
Peter Vágner likes this.
Peter Vágner reshared this.
LiveATC.Net Recordings - interesting air traffic communications captured by LiveATC userswww.liveatc.net
Peter Vágner reshared this.
Peter Vágner likes this.
The AirPods Pro 3 flight problem
Link: basicappleguy.com/basicapplebl…
Discussion: news.ycombinator.com/item?id=4…

Testing Apple’s latest noise-cancelling earbuds at 39,000 feet reveals a potential flaw most users won’t notice, until they fly.BasicAppleGuy (Basic Apple Guy)
reshared this

Simple Accessible Radio Automation. Contribute to michaldziwisz/sara development by creating an account on GitHub.GitHub
reshared this
Peter Vágner likes this.
Peter Vágner likes this.
Peter Vágner reshared this.
When using a Bluetooth device such as a speaker or earbuds and raising the volume during a call, speech output eventually stops completely until the volume isKareen Kiwan (Accessible Android)
reshared this
reshared this
Zach Bennoui reshared this.
Peter Vágner likes this.
Peter Vágner likes this.
Do you know that you can use Subtitle edit to transcribe audio? It has a relatively accessible guy so you can use Purfwiev's faster whisper xxl, cpp, cpp cublas, const-me. Longer post how to use it follows:
Download the program from the developer’s website. Navigate to the level 2 heading labeled “Files.”
If you want to install Subtitle Edit normally, download the first file, labeled setup.zip.
There is also a portable version available, labeled SE_version_number.zip.
If you decide to use the portable version, extract it and move on to the next section of this article. The installation itself is standard and straightforward.
NVDA cannot automatically obtain focus in lists.
To find out which item in the list is currently selected, move down with the arrow key to change the item, then press NVDA+TAB to hear which one is focused.
In the folder containing your original file, you’ll now find a new file with the .srt extension.
This is a subtitle file—it contains both the text and the timing information. Since we usually don’t need timestamps for transcription, we’ll remove them in Subtitle Edit as follows:
If you’re transcribing multiple recordings, it’s a good idea to close the current subtitle file by starting a new project using Ctrl+N or by choosing File → New.
Downloaded models can, of course, be reused, so future transcriptions will go faster.
In this example, I used Purfwiev’s Faster Whisper. If you want to use a different model, you can select it from the model list, and Subtitle Edit will automatically ask whether you’d like to download it.
Peter Vágner likes this.
Peter Vágner reshared this.
like this
reshared this
Peter Vágner reshared this.
During last 3 months I am using VDO ninja for all my remote interwiev and podcast recordings. here is my article about it from the blind perspective, focused on accessibility and audio.
Have You Ever Wanted to Record an Interview or Podcast Online? You’ve probably faced a few challenges:
How to transmit audio in the highest possible quality?
How to connect in a way that doesn’t burden your guest with installing software?
And how to record everything, ideally into separate tracks?
The solution to these problems is offered by the open-source tool VDO Ninja.
It’s an open-source web application that uses WebRTC technology. It allows you to create a P2P connection between participants in an audio or video call and gives you control over various transmission parameters.
You can decide whether the room will include video, what and when will be recorded, and much more.
In terms of accessibility, the interface is fairly easy to get used to — and all parameters can be adjusted directly in the URL address when joining.
All you need is a web browser, either on a computer or smartphone.
The basic principle is similar to using MS Teams, Google Meet, and similar services.
All participants join the same room via a link.
However, VDO Ninja distinguishes between two main types of participants: Guests and the Director.
While the guest has limited control, the director can, for example, change the guest’s input audio device (the change still must be confirmed by the guest).
VDO Ninja works in most browsers, but I’ve found Google Chrome to be the most reliable.
Firefox, for some reason, doesn’t display all available audio devices, and when recording multiple tracks, it refuses to download several files simultaneously.
Let’s imagine we’re going to record our podcast, for example, Blindrevue.
We can connect using a link like this:
https://vdo.ninja/?director=Blindrevue&novideo=1&proaudio=1&label=Ondro&autostart=1&videomute=1&showdirector=1&autorecord&sm=0&beepFor guests, we can send a link like this:
https://vdo.ninja/?room=Blindrevue&novideo=1&proaudio=1&label&autostart=1&videomute=1&webcamlabel=Peter or label=Marek.
Simply open the link in a browser.
In our case, the director automatically streams audio to everyone else.
Participants also join by opening their link in a browser.
If a nickname was predefined, they’ll only be asked for permission to access their microphone and camera.
Otherwise, they’ll also be prompted to enter their name.
Usually, the browser will display a permission warning.
Press F6 to focus on it, then Tab through available options and allow access.
The page contains several useful buttons:
To change your audio devices:
Each guest appears as a separate landmark on the page.
You can navigate between them quickly (e.g., using D with NVDA).
Useful controls include:
Under Audio settings, you can:
Our URL parameters define automatic recording for all participants.
Recordings are saved in your Downloads folder, and progress can be checked with Ctrl+J.
Each participant’s recording is a separate file.
For editing, import them into separate tracks in your DAW and synchronize them manually.
VDO Ninja doesn’t support single-track recording, but you can use Reaper or APP2Clap with a virtual audio device.
To simplify synchronization:
autorecord.&autorecord, reload the page, and confirm rejoining.
To start recording manually:
In this article, I’ve covered only a few features and URL parameters.
For more details, check the VDO Ninja Documentation.
reshared this
reshared this
Paweł Masarczyk
in reply to Peter Vágner • • •Peter Vágner
in reply to Paweł Masarczyk • •